Caramel Caramel: Cherry/True Ending Guide
Having trouble finding the true ending in Caramel Caramel, or just beating the game in the first place? This guide might help. Maybe.
General Tips
- Your camera not only stops enemies, but also increases damage against photographed enemies and allows you to kill all enemies of the same type within a photo simultaneously. Make liberal use of it.
- Photographing a red enemy will turn it into a wrench, which will heal you. There's one red enemy per main stage.
- Photographing enemies on walls and ceilings (such as Turrets, Wallbombs, and Dolphins) will cause them to fall to the ground, instantly killing them. If they hit an enemy on the way down, it'll kill them as well. Using this technique makes one section near the end of the final level much easier.
- Your charge shot fires in a spread, but also bounces off walls. If there's a wall in front of you, you can use this to kill enemies behind you.
- Crystals move towards you significantly faster when you're not shooting. This can allow you to quickly recharge your camera after using it.
- Certain suspicious objects in the background can be photographed to release multiple orbs. Shooting the orbs will grant points; the more orbs you destroy in a single life, the more points they'll give, up to a maximum of 200. However, this uses up camera charge, so this isn't recommended if you're just trying to beat the game.
- Yes, this game is hard. You will get better with practice. If you need to practice a certain level, you can enter the code TEST-LENS in the terminal to access the level select.
The True Ending
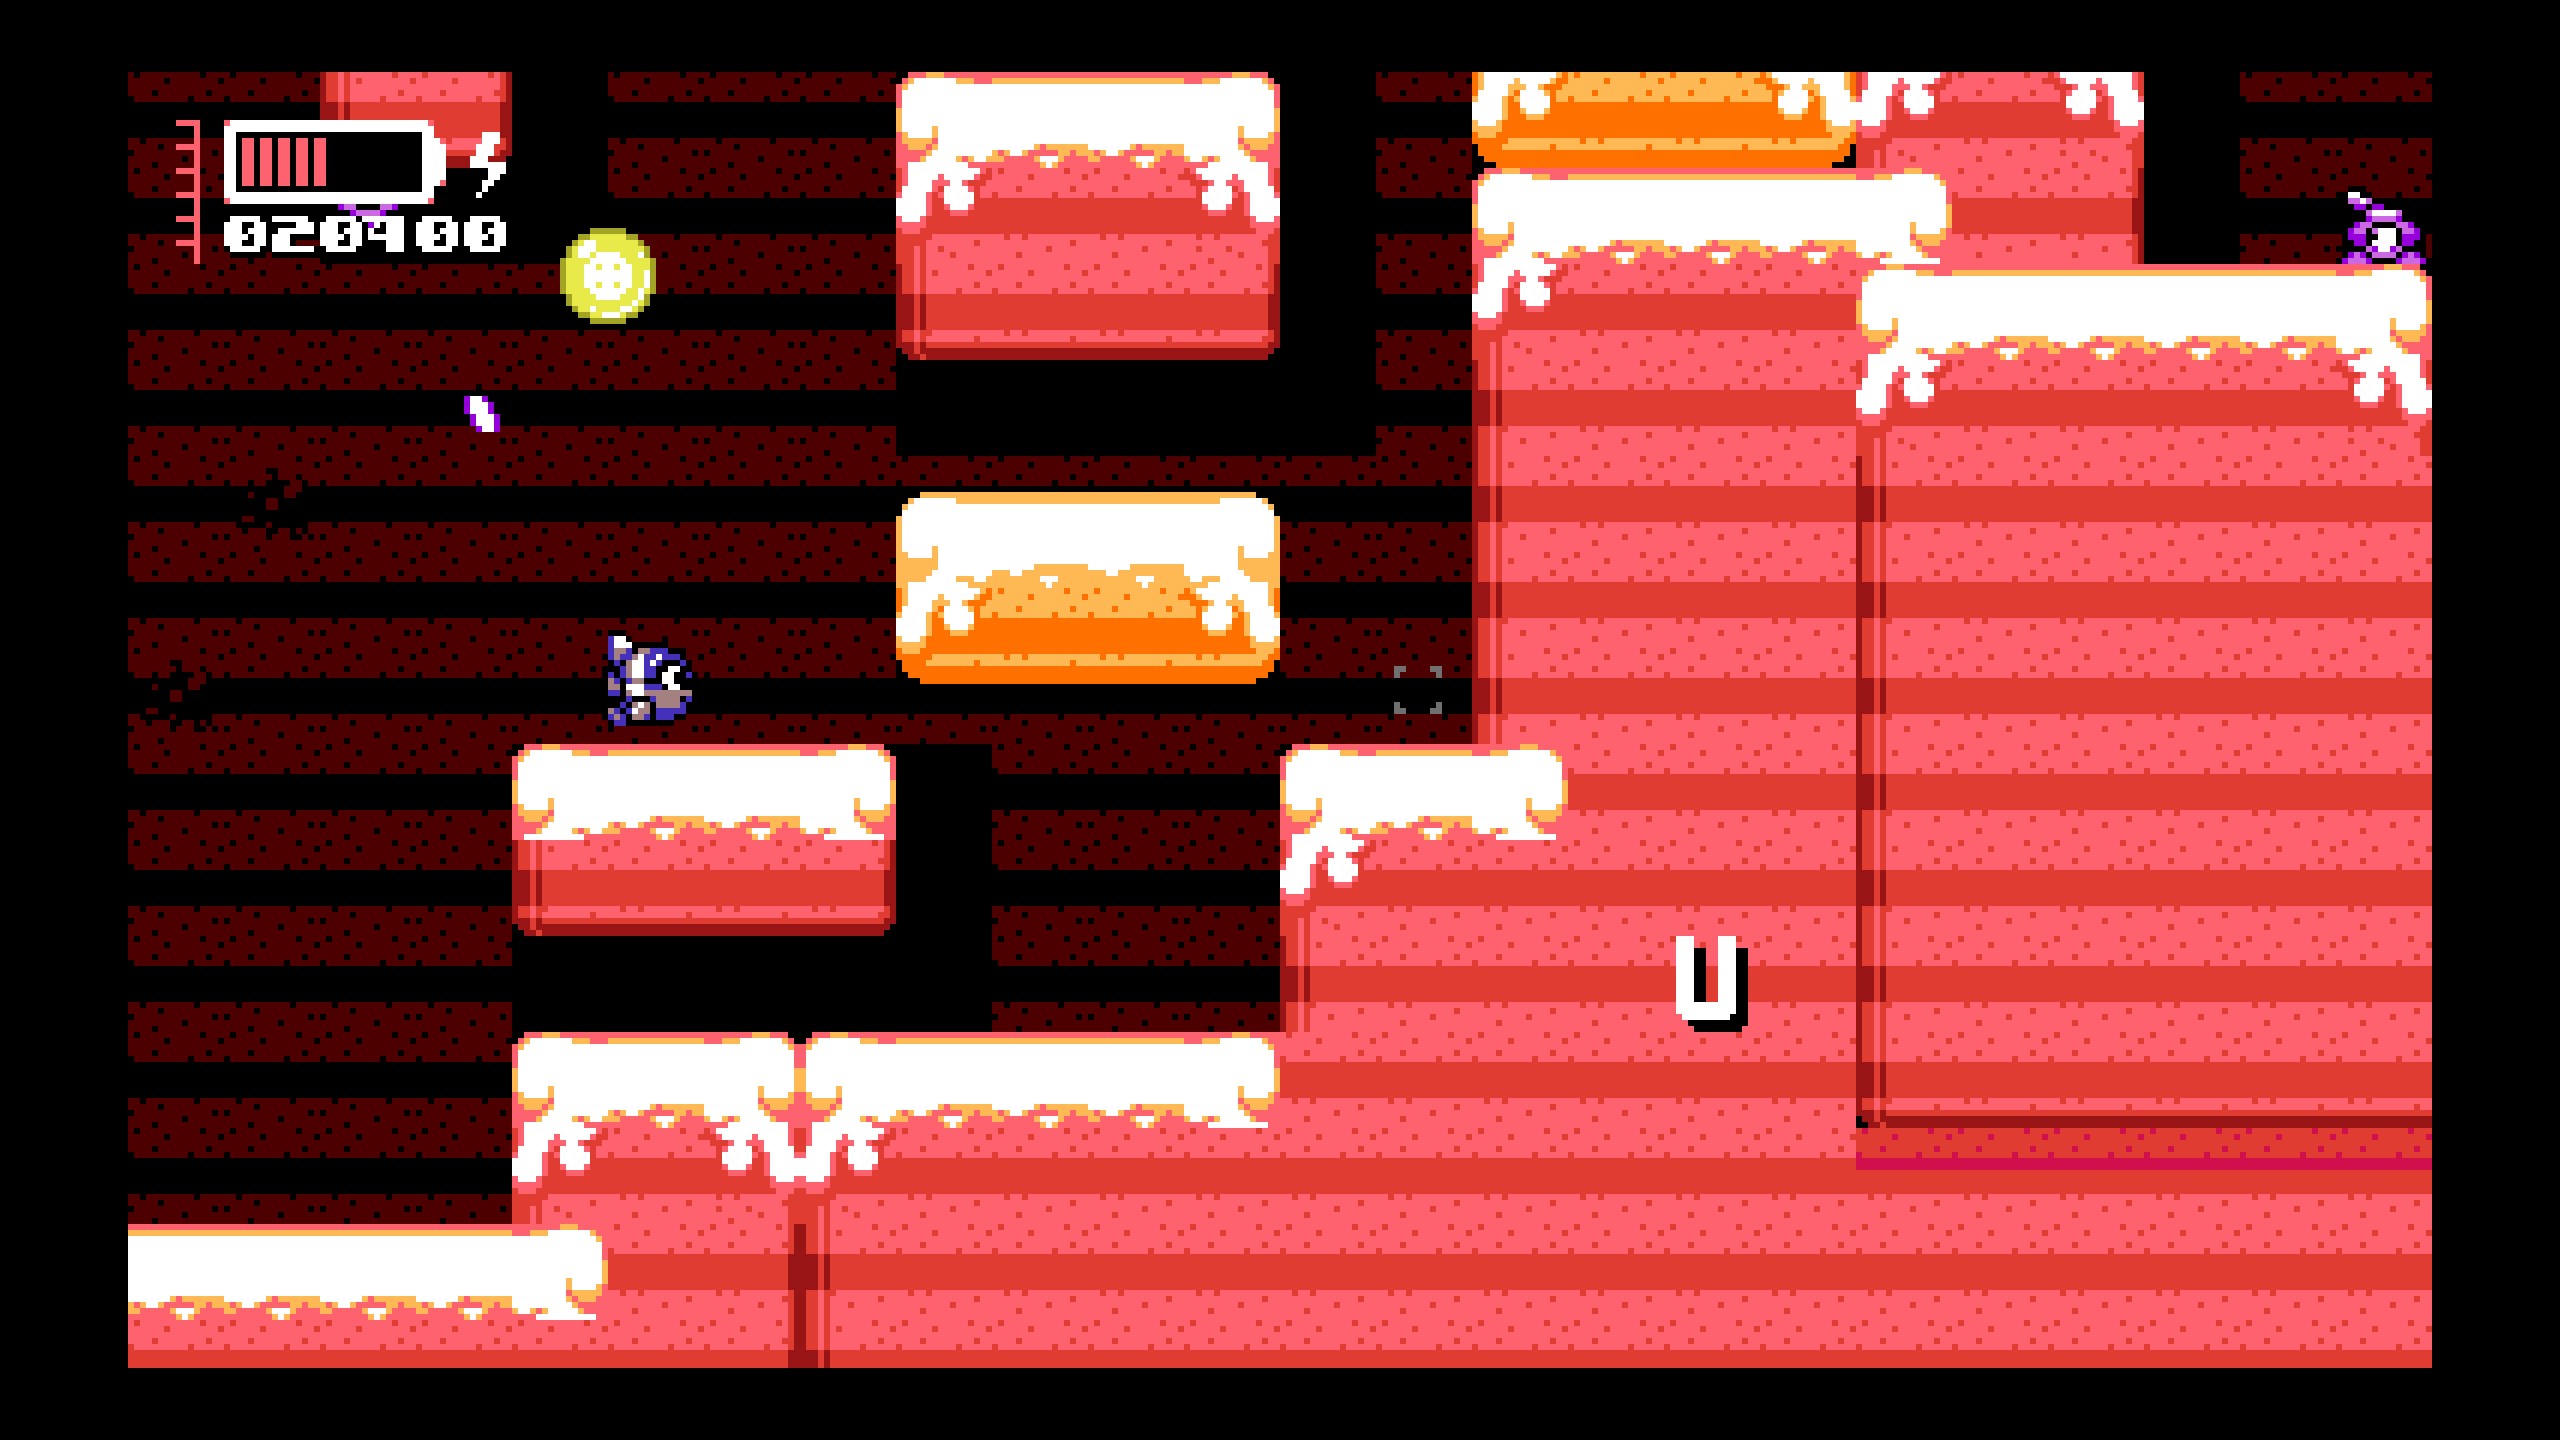
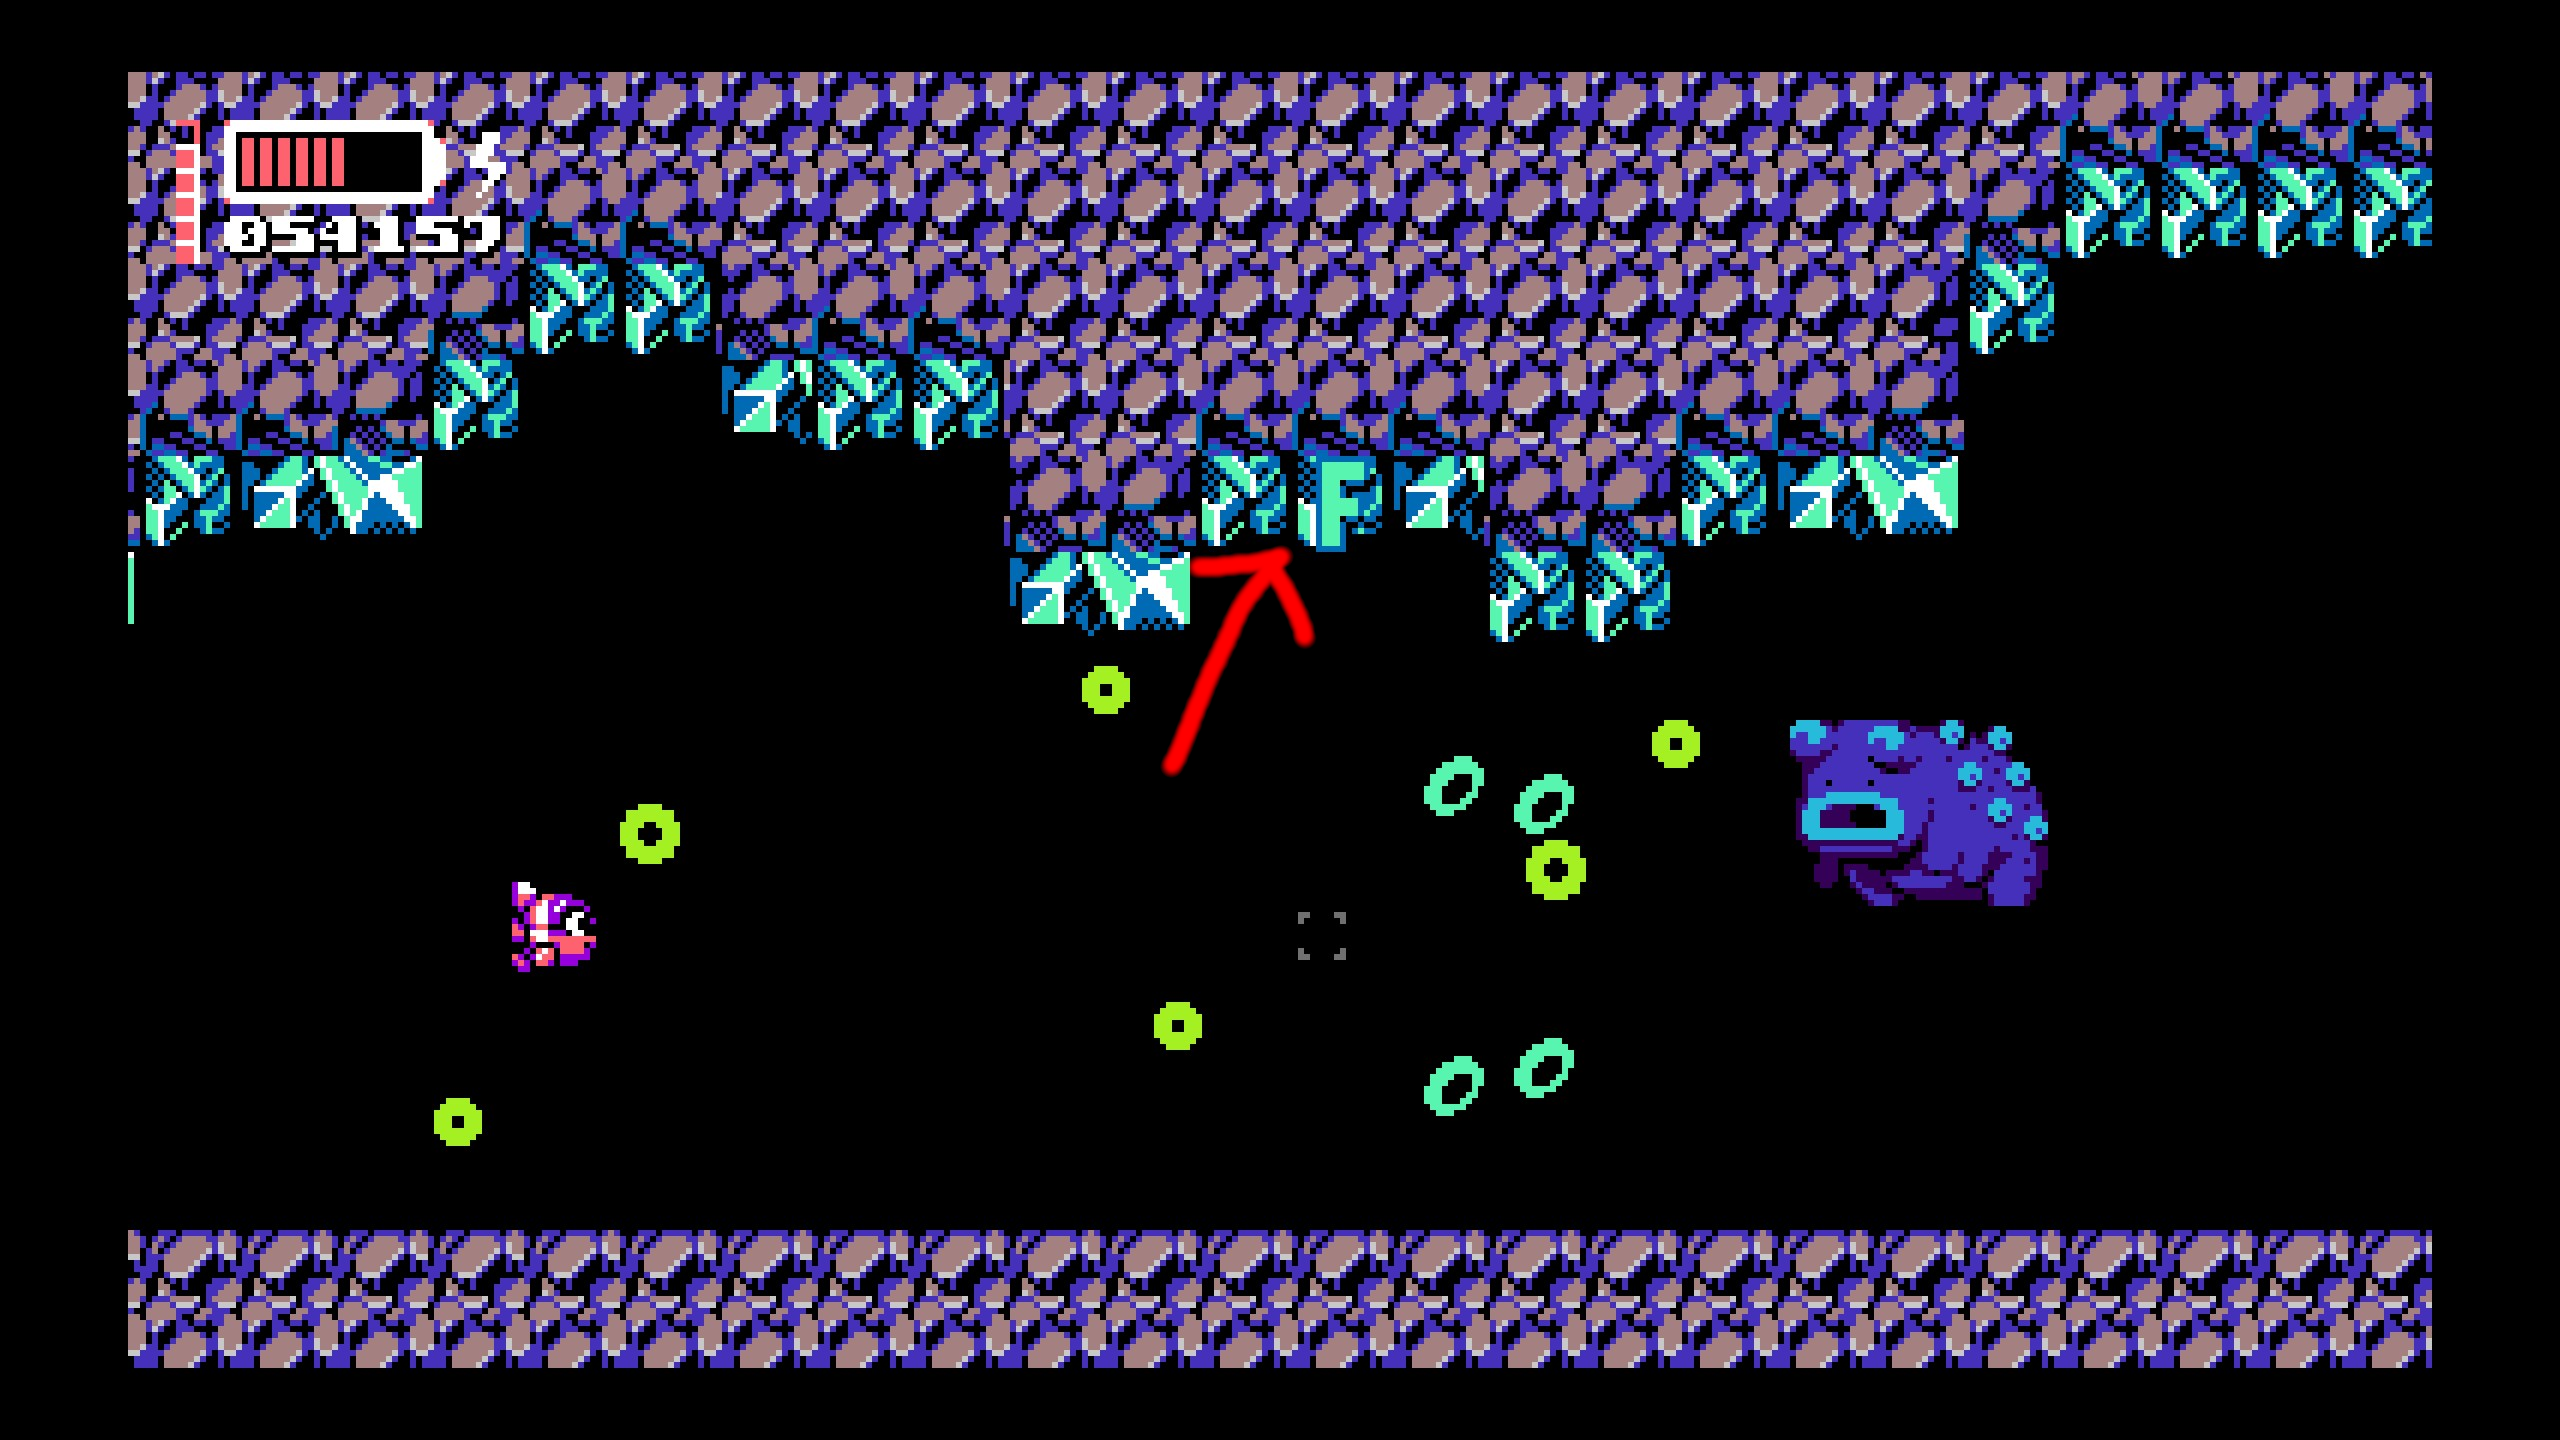
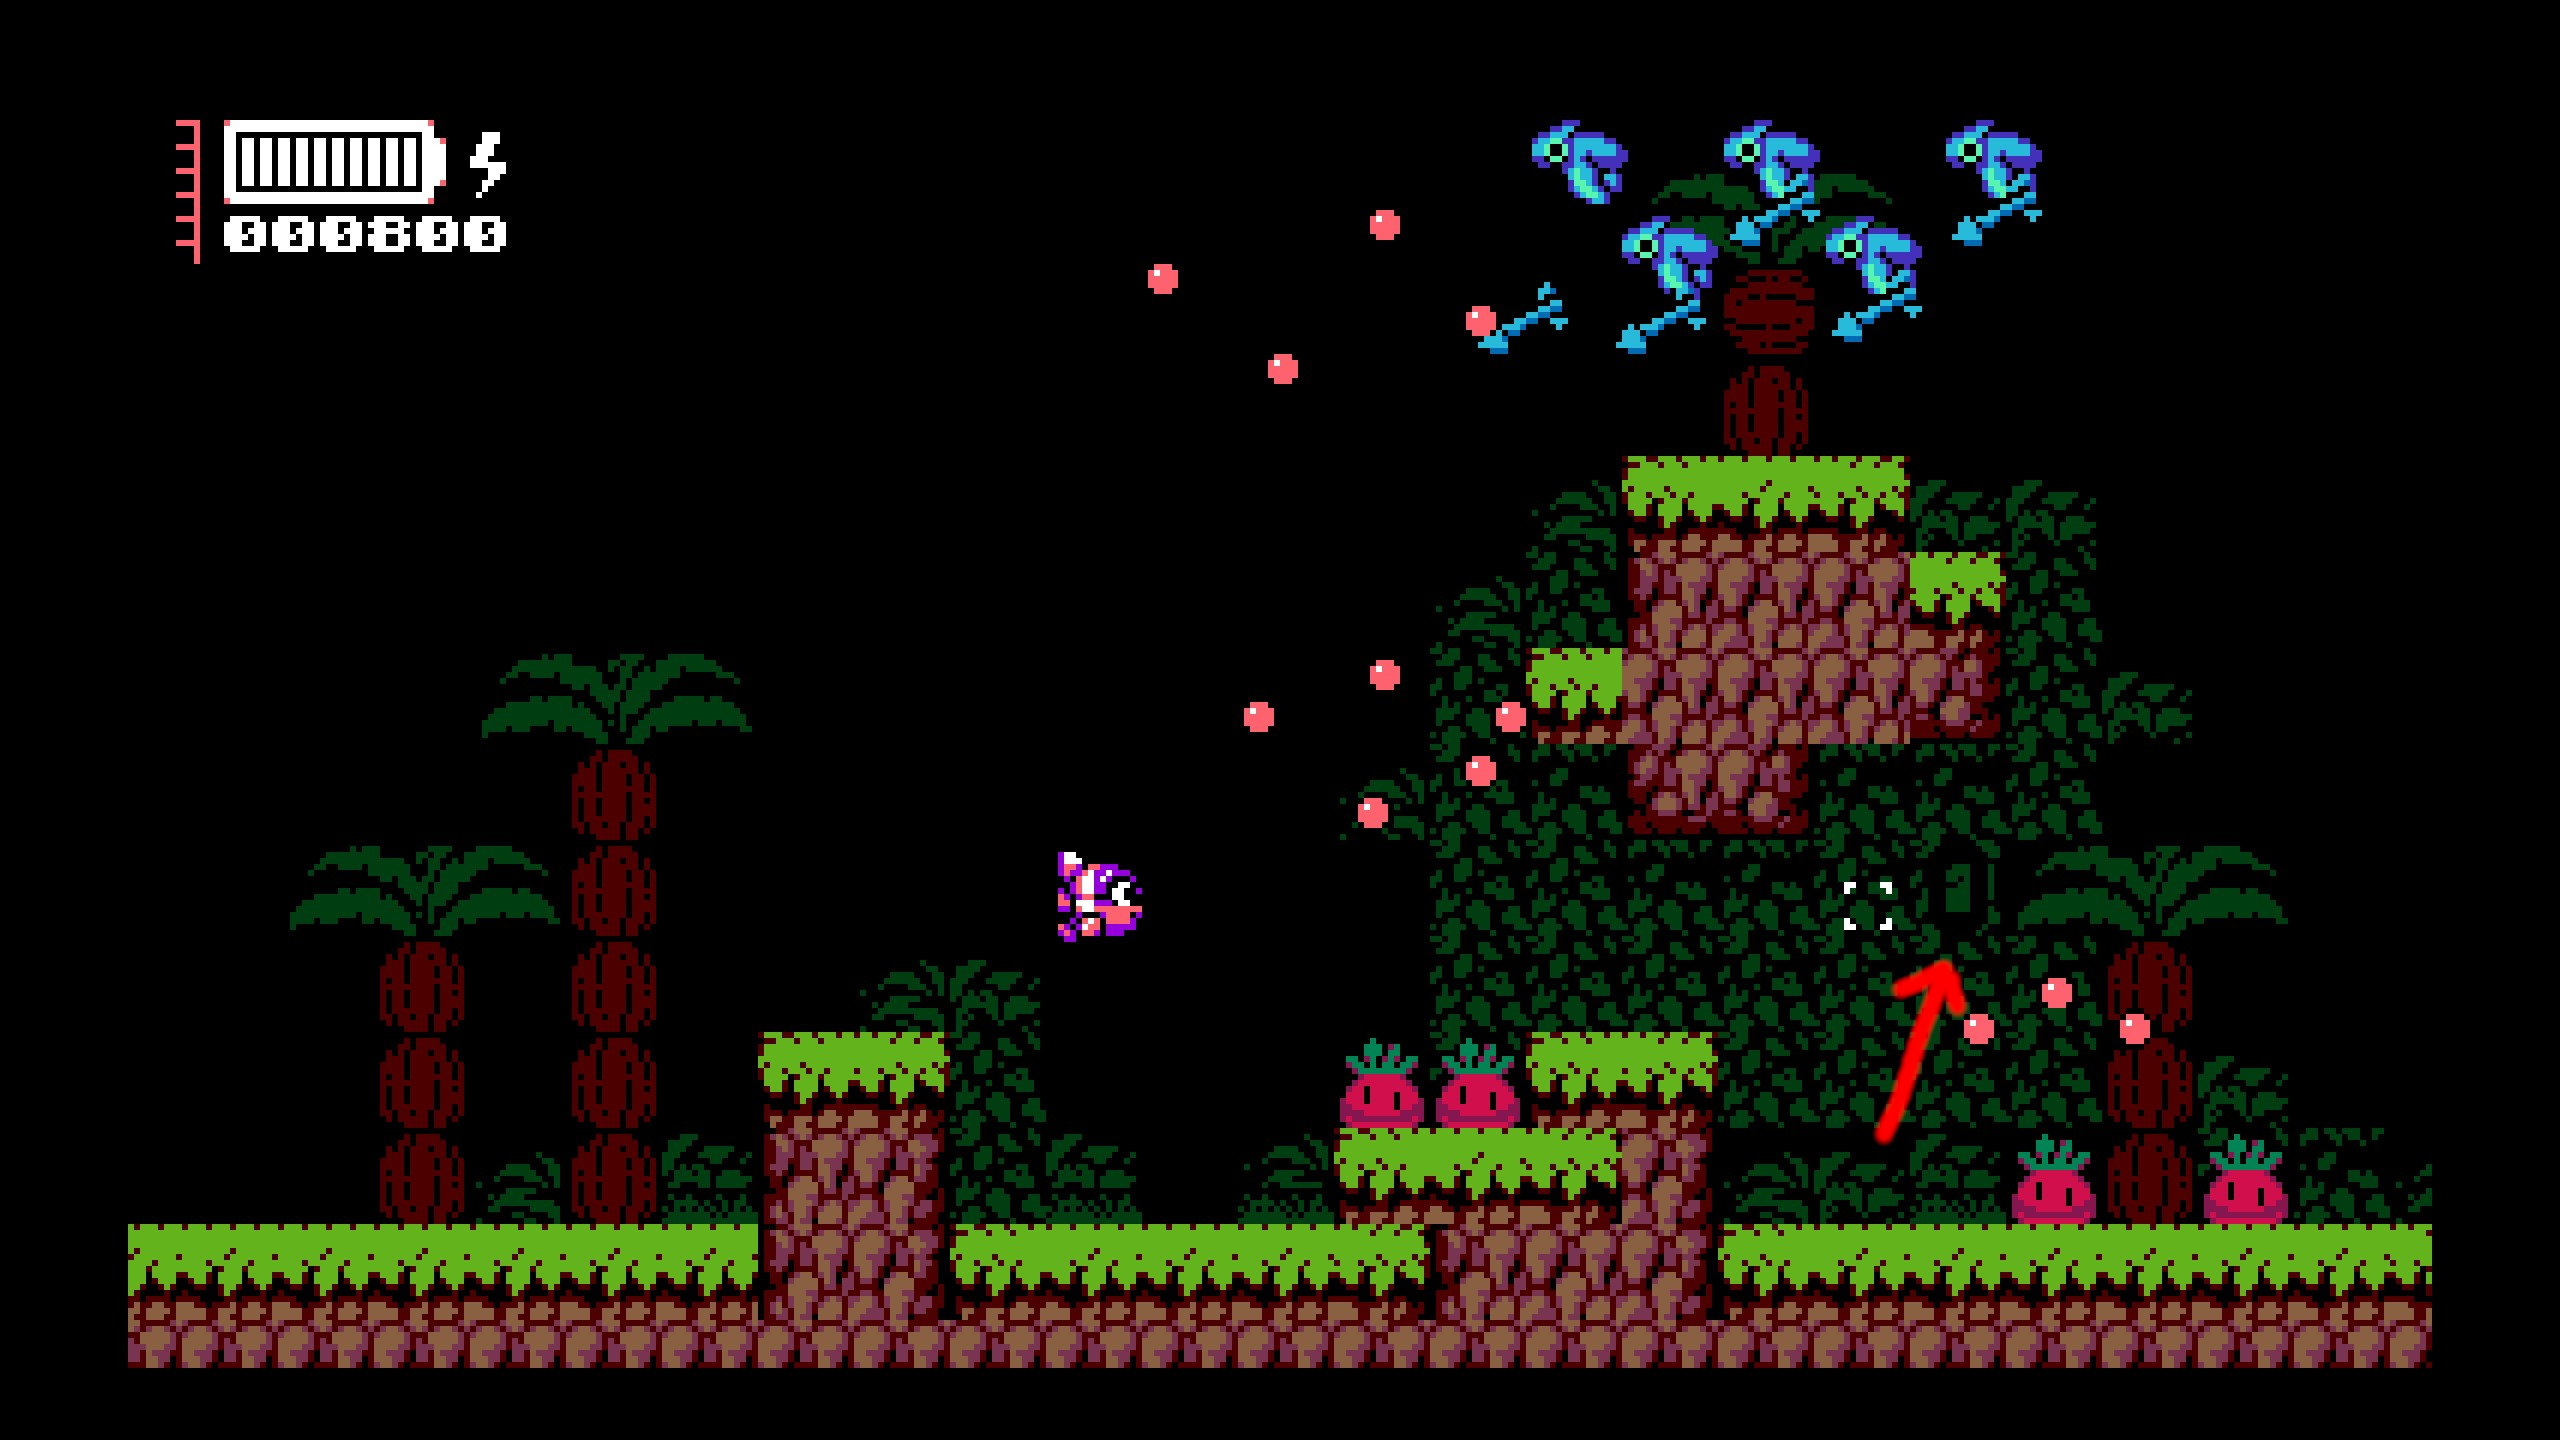
Caramel Caramel has a secret final boss that you need to beat to get the Cherry for this game. To fight it, you need to photograph three letters throughout the game that spell "UFO", with one letter being hidden in each main level. They'll occasionally sparkle as well, making it easier to find them. Taking a picture of the letter will light it up, confirming that you activated it. Note that they will stay lit up even after you die (unless you restart, of course).
Here are all of the letter locations:
Snack Planet
Hidden at the bottom right of the second scrollable section, right before the boss.

Ghost Planet
Hidden in the ceiling of the section with the mini-boss. Note that you won't have enough camera charge to photograph the letter and also kill the mini-boss.

Dino Planet
Hidden near the start of the level, within the negative space of the background foilage.

The Final Boss
Once you kill the final boss with all three letters photographed, you'll finally be able to fight the true final boss. Don't worry, if you were able to beat the rest of the game, this boss shouldn't give you any trouble.
Source
This guide is based on information from the original source: Steam Community Guide.