Avianos Ancestors, Miracles, Units, General Info
Avianos information on Ancestor, their miracles, units, structures, and maybe a half-baked tip or two.
Ancestors
These are the Ancestors at each of their power stages. The Ancestor needs to prayed to (selected)
to gain their Favor twice in order to reach an ability improvement (blessing), excluding the use of Brontor's Sacred Offering miracle.
You can upgrade abilities up to their second and maximum strength in any order you like.
Only 3 Ancestors are available on turn 1 to pick from and these are randomized. Once you pray to an Ancestor, it won't be available to pray to for 2 turns (the enemy's turn and your next turn), giving the enemy the next opportunity to pray to it if they desire.
Brontor
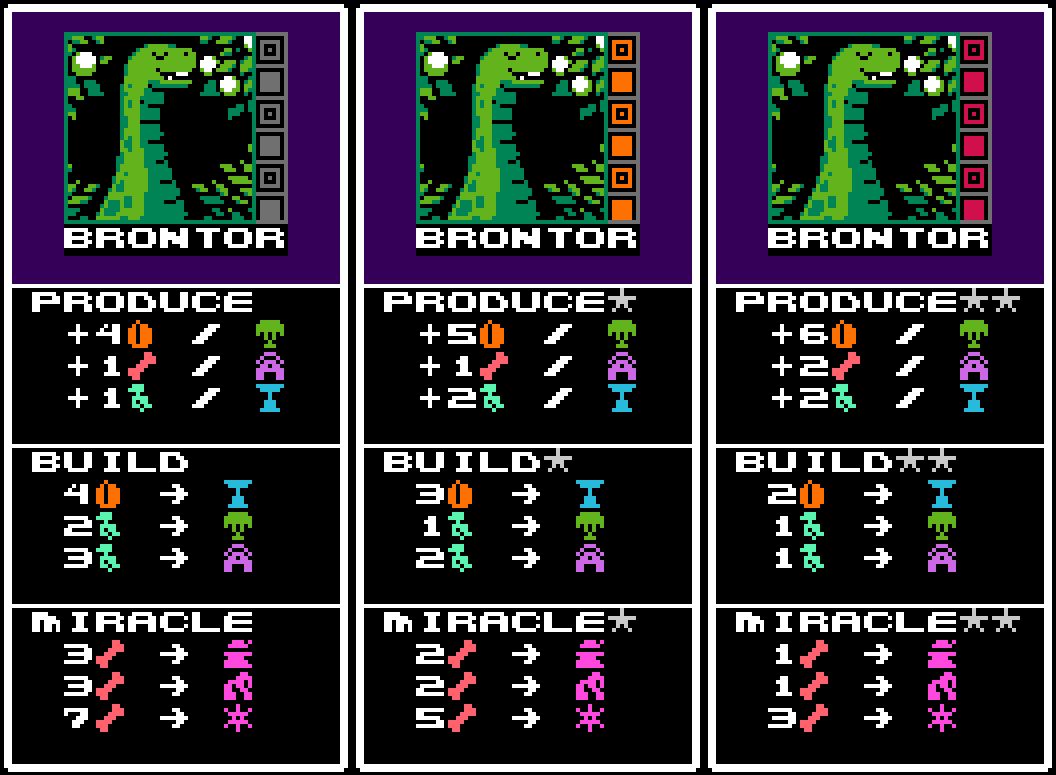
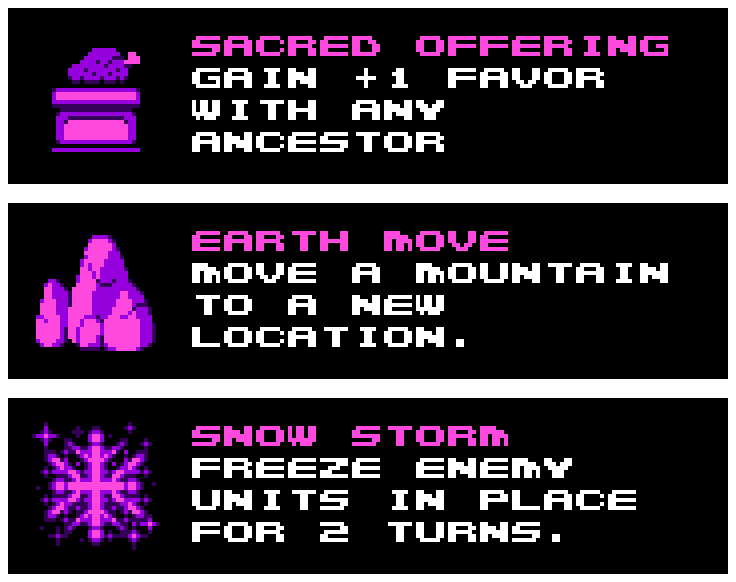
Brontor's miracles
Brontor is your best economy Ancestor once you have buildings up, giving you equal or better value compared to what other Ancestors give you. That said, Brontor won't be your best first choice pick in a game unless you have a mountain to move or want to rapidly tech another Ancestor, since Brontor has no movement ability to capture, has only 1 building to generate resources from, and can only build 1 building since the starting castle comes with 2 structures already built.
After turn 1, Brontor can be a wonderful source of raw resources and utility with miracles, being able to rapidly upgrade other Ancestors, moving mountains either out of your way into the enemy's way — or even on top of an enemy castle to remove that annoying castle wall advantage (it still counts as a castle tile for the 4 castle capture goal), as well as freezing all enemies on a tile for a sufficient amount of time.
Incidentally, when you freeze a tile you don't have vision for (through Trilock's Holy Vision miracle or if playing Versus), it will tell you how many units you freeze, or if you freeze none at all.
Quetzal
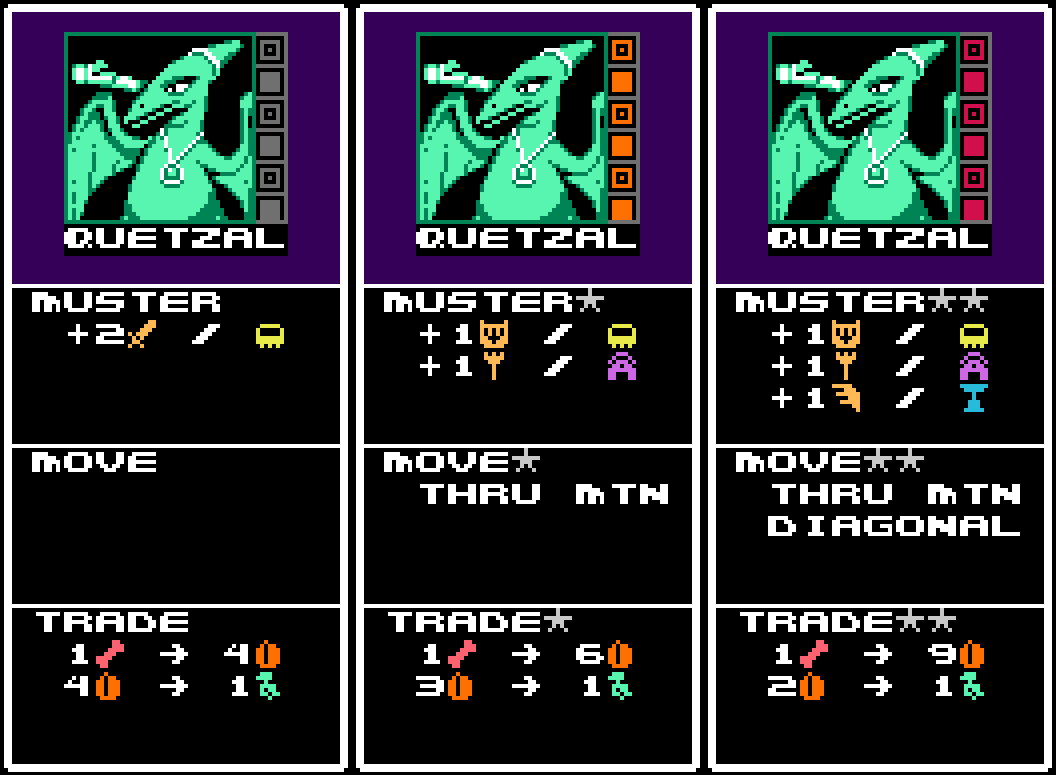
Quetzal is a Ancestor that will give you free units depending on building type, with both the benefit and drawback of having units spread throughout your areas of control, giving you many high value units for free once you have your economy set up.
A decent starting pick for your first Ancestor due to the 2 free soldiers and movement to capture another tile. Can also trade out your resources for potentially more valuable ones, such as seeds for workers to build stronger economy. Quetzal can also move through mountains fairly early if you rush upgrades for movement.
It's ideal for Quetzal to turn 1 move onto a tile to get the 4 bone drops, which Quetzal can then change the now 7 (3+4) Bones into 38 Seeds (10+28). Which can ideally be turned into 6 more Workers for 9 (max) total to use with either Brontor or Stegnar to build within the next round or two, with 14 seeds to spare for Recruitment or Worker Baths.
Rexadon
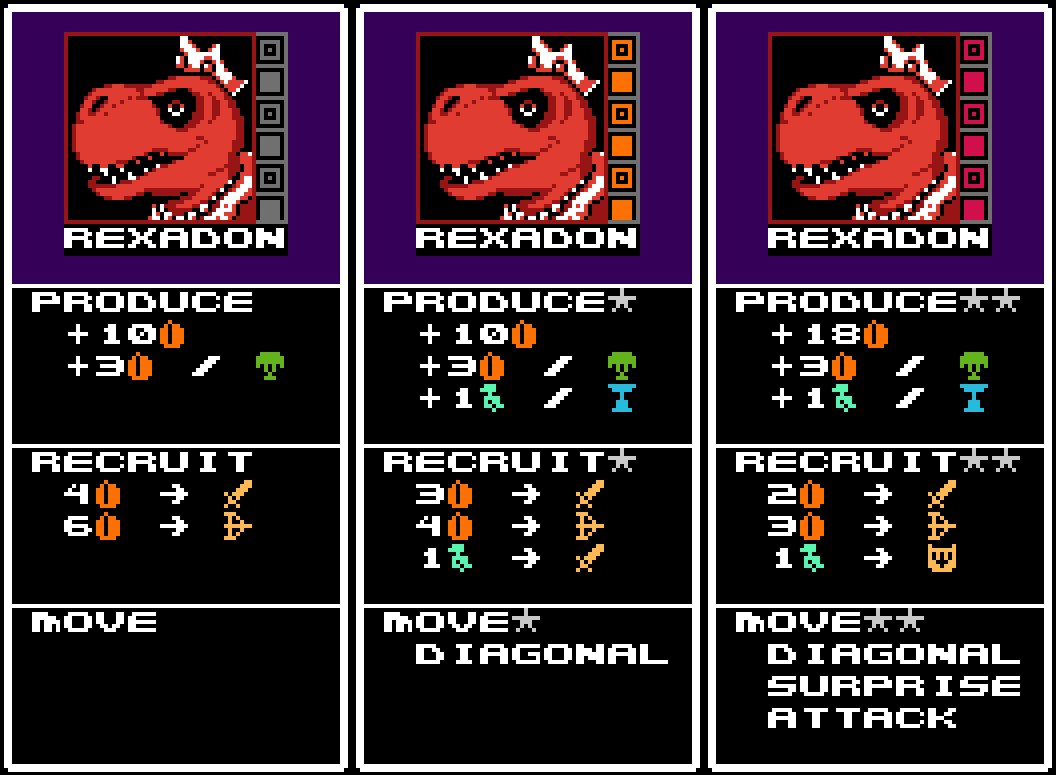
Rexadon is a strong start pick and late game pick due to Rexadon's ability to give you a solid chunk of Seeds and a little bit of Workers, the ability to recruit Dodo Soldiers and Duck Archers at especially cheap cost later, Hawk Knights at a little more cost premium, with the ability to move to capture tiles and even Surprise Attack for great effect later on. Rexadon's only weakness is mountains, really.
One interesting use of Surprise Attack is that as long as you never attack an enemy unit, you can scout a tile and safely retreat as the Surprise Attack will never wear off.
His Seed generation can be used in conjunction with Brontor's build to construct a lot of Worker Baths early on.
Stegnar
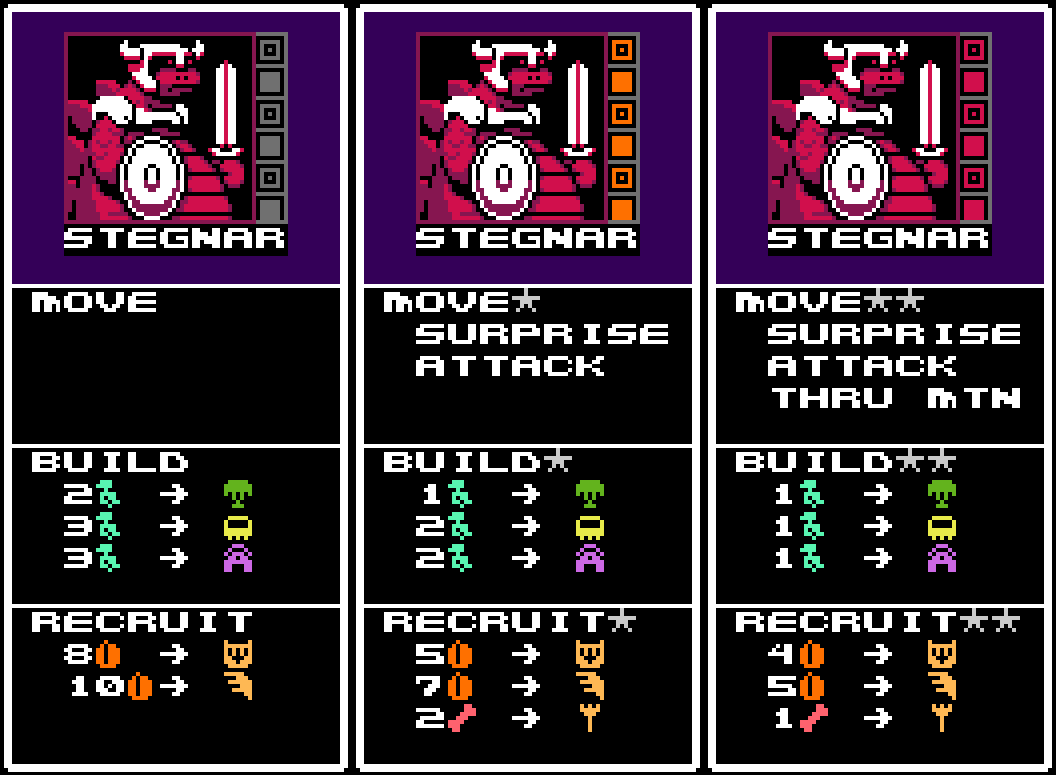
Stegnar is a strong early choice with the ability to move and then immediately build, especially since you can move first into a tile with resources such as Workers, then immediately use those workers to build multiple buildings.
Stegnar is also a good choice for heavy offensive because of the early Surprise Attack movement upgrade and expensive but very useful Knight Hawks and Humming Bombers. Stegnar can also recruit Owl Priests using bones—the only Ancestor to recruit units using this resource—but you're probably better off using the bones for Miracles.
Trilock - Campaign Trilock
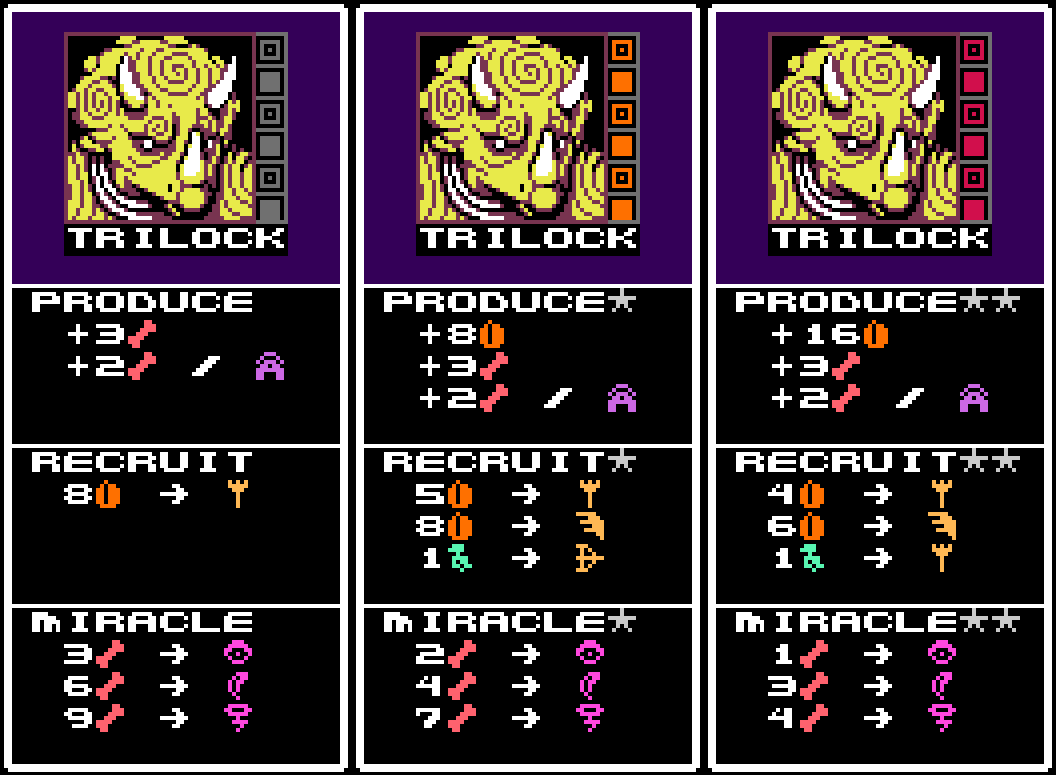
Trilock's Miracles (Campaign)
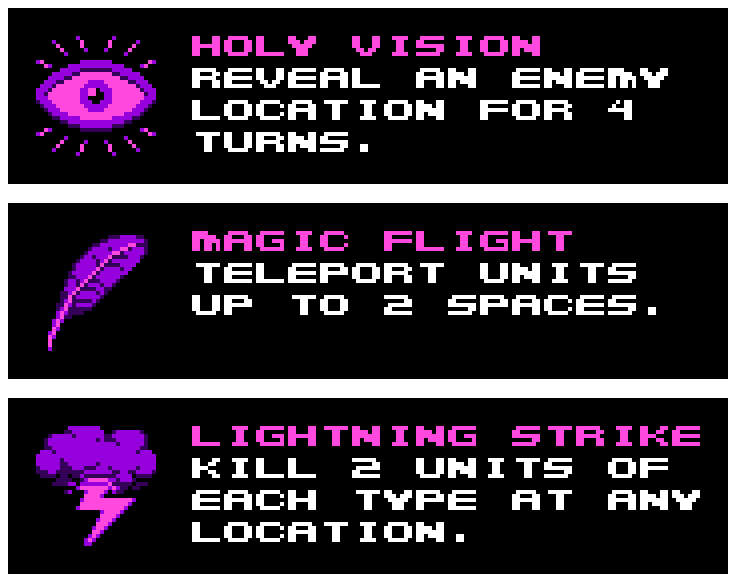
Trilock is a good contender for your first Ancestor thanks to its Magic Flight miracle. As the player starts with 3 Bones and Trilock gives you 3 Bones upon praying to it, the player can immediately teleport units up to 2 tiles away, including on top of castles or mountains. This is also a very powerful late game, being the only Ancestor that move multiple times in a turn thanks to Magic Flight. This is extremely useful for ignoring the enemy blocking you from getting inside the much more defenseless territories. You can also make pit stops at tiles with resources to claim the bones and then potentially teleport again.
While Magic Flight stands out the most, Holy Vision is also useful in telling you exactly what awaits ahead, as well as what structures a tile can have if you deem them better in your hands and no one else's. This ability is campaign only since both players can always see this information.
Lightning Strike, as good as it is, is ironically probably Trilock's weakest Miracle. As there are 5 unit types and it kills 2 units per type, at best it will destroy 10 units, but most likely less. A good strike early on if you have the spare Bones can really set back the opponent.
Interestingly, Trilock is different in Versus than in Campaign.
Trilock - Versu
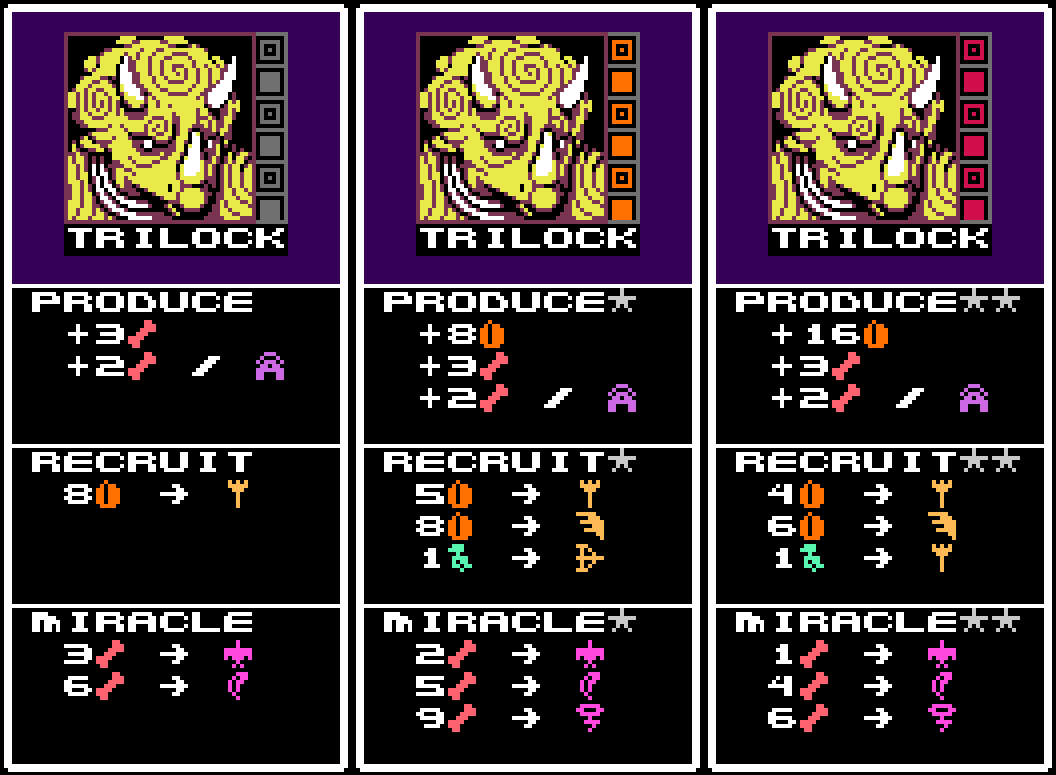
Trilock's Miracles (Versus)
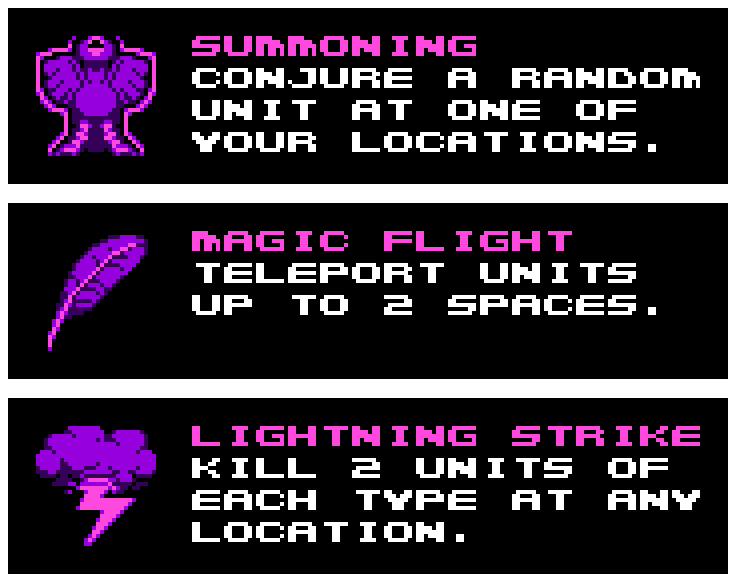
Different than Campaign, Trilock's Holy Vision is replaced with Summoning (since no resources or information is hidden), which allows the player to summon 1 unit randomly. It could just be my bizarre luck, but it seems that later in the game it summons the higher cost units much more commonly, with the beginning usually being Dodo Soldiers or Duck Archers.
Magic Flight's upgrades are also weaker, costing more late game than in Campaign. Lightning Strike isn't even available without upgrading Trilock's miracles once, with it also costing more.
Structures
There are four Structures you can build in Avianos, and one you can't.
Military Nest
Allows units to be recruited on tiles, especially that of non-castle ones.
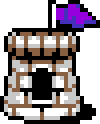
They are used in the Ancestor Quetzal's Muster Miracle, spawning either 2 Dodo Soldiers or 1 Hawk Knight depending on Miracle strength per Military Nest built on the faction's territory.

Seed Factory
Seeds are backbone resource the game that allows the player to recruit most battle units as well as build Worker Baths. Seeds cap at 99.
Brontor and Rexadon use these to generate the Seed resources, and are built by Brontor and Stegnar.

Worker Bath
Generates Workers , which are used to construct most structures, as well as sometimes an alternate payment for some battle units. Workers cap at 9.
Brontor is the only Ancestor who can build Worker Baths, also generating Workers per Worker Bath and uses Workers to build Seed Factory and Houses of Worship.
Quetzal uses these to generate Humming Bomber's when the Muster Miracle is at full strength.
Rexadon generates Workers per Worker Bath with an upgraded Produce level.
Stegnar uses Workers to build Seed Factories, Military Nests, and Houses of Worship.

House of Worship
These are the basis of Bone generation, which are used for miracles, resource exchanging, and one alternative unit procurement. Bones cap at 9.
Trilock and Brontor use these to generate Bones as well as for casting Miracles.
Queztal uses these to generate Owl Priests per House of Worship owned with an upgraded Muster Miracle.
Stegnar uses Bones as an alternative payment to recruit Owl Priests.

Castle
The only Structure that can't be built, as it also counts as terrain. Like a Military Nest, you can recruit units from a Castle even without it having a Military Nest. It also doubles as an amazing bulwark for defensive battles, and capturing 4 and holding them for 2 turns is the victory condition.
Units and Battles
There are 5 combat units in Avianos.
Dodo Soldier
The basic soldier and expendable backbone of the army. Has fast movement and will generally put up a good fight save for Duck Archers on top of castle walls, or against Humming Bombers which it has no way of attacking.

Duck Archers
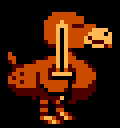
The unit with the longest range and your best friend for defending castles. They're slow, which ironically doesn't affect invading too much because of their long range. However, it will affect their ability to flee greatly, their sluggish movement likely costing them their life. Their already long range is improved on higher terrain, such as castle walls.
They outrange Owl Priests but are almost completely useless against Hawk Knights unless they can get around its shield. The AI will often target Hawk Knights even if there's better targets.

Hawk Knights
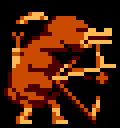
An upgrade to the Dodo Soldier, they're great for attacking castles due to their ability to defend against volleys of arrows. Like the Dodo Soldier, they're completely useless against Humming Bombers, and Owl Priests' powerful magic will destroy their shield within a couple strikes, rendering them vulnerable to arrows and anything else, really. Even mixing just a few into your army can make a massive difference due to the Archer AI tending to target them instead of others.
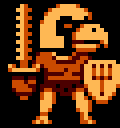

Owl Priests
Owl Priests are casters of magic, and while similarly slow like Duck Archers and outraged by them, they deal more powerful attacks and are the non-flying bane to Hawk Knights.
Unlike Duck Archers, their range does not seem to be improved on high terrain.


Humming Bomber
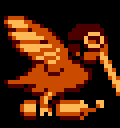
The only flying unit and everyone's beloved explosion-maker, they are the flying bane to Dodo Soldiers and Hawk Knights who simply have no way to deal with them. Even against Duck Archers and Owl Priests, the battle AI often chooses to target ground units instead of them, making them an expensive but powerful unit in battle. However, when Archers or Priests do decide to target them, Humming Bombers attack in melee range, giving the Archer or Priest plenty of time to shoot them. Humming Bombers themselves also have quirky priorities, such as running past a unit to bomb something way behind it.
They can attack other Humming Bombers as well.

Battle
Battles are fought mostly automatically, with the player being given the choice to go on the Attack; Hold to stay put and do not move no matter what (even if they die from it, though they will attack in range); Raze to destroy built structures on the tile in the event you don't want your enemy to have them in a lost battle, or if you want to remodel a bit after you take a tile for yourself; and flee, to tactically scout and withdraw (run away) from a battle.
In general defense is favored, but don't stay on Hold for too long once the enemy gets close, since the enemy won't hesitate to go to each held unit one by one and teach their bird brain a thing or two. Choosing to Attack at the right time in a defensive castle battle can also help block enemies from rushing into the squishier lads.
40 units from each side can be on the battle at one time, the rest appearing as "extra" reinforcements as units are lost. This favors defense, but isn't quite as helpful against a 40 unit strong Surprise Attack.
If no unit takes damage in a fought for a few moments, the battle will end with the Attacker retreating. The most hilarious example I have of this is 20 archers attacking a single Hawk Knight on Hold, the battle ending uneventfully before too long.
Expanding
When starting the game, movement to get to another tile for more territory is essential. Each unexplored tile that isn't a Castle will have resources to gather.
 means you will get 12 Seeds.
 means you will get 3 Workers.
 means you will get 4 Bones.
Natural mountains contain 2 of these resource drops.
Which of these are available for you to move in on your first turn can influence which ancestor you first pick. For example, if Bones are the only available option to you, you can use Quetzal to turn these 4 bones into 16 Seeds (4 more than what a Seed tile gives), and then convert those 16 Seeds into 4 Workers to build Structures next turn.
Or, if a mountain is in your way or if you just want the double mountain payment, you can use Trilock to turn 1 teleport onto a mountain, which you can just safely Move off of (but don't count on moving back onto it easily).
General Strategies and Tips
As the the map layouts and available choices are fairly randomized, there won't be an all-be solution to your current predicaments.
Turn 1 and 2 strats
Brontor
is the only Ancestor that's not good to pick Turn 1. Picking Brontor turn 1 will get you 4 Seeds from your starting Seed Factory and let you build 1 Worker Bath right away, but no tile expansion to build on with little synergy for the next Ancestor. You can use Brontor's miracle to gain 1 Favor with Rexadon and upgrade his Produce ability to at least get 1 Worker from the Worker Bath, but it's not ideal and if the enemy decides to pray to Rexadon, you're just out of luck. You can use Brontor's turn 1 to move a mountain out of the way and to potentially completely block in the enemy, but odds are the enemy will just pray to Trilock to get around it anyway. Hilarious if it doesn't, though.
I personally will upgrade Brontor's Build once, then save the second Build level for last.
Rexadon
as a first pick is great if you're next to a Worker tile, good if you're next to a Seed tile, and not the best if you're next to a Bone tile. His starting Seed boost can quickly help build Worker Baths with Stegnar or Brontor next turn, and hopefully Seed Factories if you hit a Worker tile, not to mention still have plenty of Seeds to recruit, but you're probably better off doing that on your 3rd turn to upgrade Recruit first for even cheaper and more units.
His second Produce level (flat +8 Seeds) isn't worth taking.
Stegnar
is also a strong pick if next to a Worker tile since he can Move first, then use the collected Workers to immediately build up to 3 Seed Factories. Combined with Rexadon for turn 2, that's a lot of Seeds (10+22) to Recruit with and move to expand farther. If the enemy prays to Rexadon to block him off you can pray to Brantor for a consolation 16 seeds, as well as build 1 Worker Bath and move a mountain in the enemy's face for the inconvenience.
I consider Stegnar's biggest benefit to be his early Surprise Attack, which does wonders if you have some units to work with. I generally take his Surprise Attack over upgrading his Build (I stop at 1 upgrade even when I do), then focusing on his Recruit ability. Or if you're just behind on units, focus the Recruit first to get some high value Humming Bombers.
Trilock
can also be a strong pick since Magic Flight will allow a turn 1 teleport onto a mountain to grab a double resource tile (either 12 Seeds + 4 Bones, 4 Bones + 3 Workers, or 12 Seeds + 3 Workers) but at the cost of 6 Bones to start with. This will give you a combination of either 22 Seeds / 0 Bones / 6 Workers, 10 Seeds / 4 Bones / 6 Workers, or 22 Seeds / 4 Bones / 3 Workers to work with. Means next turn you can use Quetzal to get another 4 Bones, convert your now 4 Bones into Seeds and convert those into up to 4 Workers and still have Seeds to spare to build next turn, and plenty of space to do it.
A good benefit to this strategy is if the opponent has mountains in the way, locking them out of Trilock next turn can be a funny way to hurt their starting expansion.
I don't find Trilock's Produce ability to be worth upgrading unless you plan on using him every turn you can, and perhaps not even then.
Quetzal
has one of the more unique starts since you want to move onto a Bone tile to get 7 Bones to convert them into (10+28) 38 Seeds, and those into 6 Workers to max out and still have 14 Seeds to spare. Then you can use Brontor to build 3 Houses of Worship (for Muster upgrade next turn to get 3 Owl Priests turn 2) and 1 Worker Bath. Alternatively, if you're next to a Worker tile, you can just Trade for 3 Workers instead and keep 26 Seeds since Stegnar can move next turn to cap 9 Workers, then build 3 Houses of Worship right after that to recruit some Humming Bombers or Hawk Knights. The biggest benefit for Stegnar is if the enemy gets too close by your 4th turn, you can Ambush them (even in a Castle) and easily set the tide for the war right there.
Of course you could not do the Muster strategy and just use turn 1 Quetzal for the resource boost and build Seed Factories and Worker Baths normally.
Unsorted tips
- Taking tiles with structures away from the enemy means less resources for them and more for you, so do it to them and not the other way around.
- You can move mountains with Brontor's Earth Move Miracle, which can be used to obstruct the enemy's path, or placed right on top of a Castle to ruin the castle terrain advantage.
- Trilock's Magic Flight Miracle can teleport you behind the enemy's main force to take what's behind them, as well as can be used consecutively to capture multiple tiles in a single turn.
- Brontor's Snow Storm is extremely powerful if you've just captured your 4th castle. After all, what army can stop you if they can't get to you?
Source
This guide is based on information from the original source: Steam Community Guide.